
A Smarter Laundry Room Starts With the Right Sink
Laundry sink installation is a home upgrade that adds real, everyday convenience — and it’s more achievable than most homeowners think.
Here’s a quick overview of what the process involves:
- Choose your sink type — freestanding, drop-in, or wall-mounted
- Pick the right location — close to existing water supply and drain lines
- Confirm plumbing requirements — you’ll need hot/cold supply lines, a P-trap, a 2-inch drain, and proper venting
- Gather tools and materials — PVC pipe, tubing cutter, wrench, faucet, and fittings
- Connect to existing plumbing — tap into supply lines and drain standpipe
- Test and seal — check for leaks and caulk around the sink edges
A basic DIY installation can cost $250–$500. Hiring a professional typically runs $1,000 or more, depending on complexity. Most installations take 2–6 hours.
Whether you’re pre-rinsing muddy work clothes, cleaning paint brushes, or just tired of using your kitchen sink for messy tasks, a dedicated laundry sink solves all of that — cleanly and efficiently.
I’m Reese Mitchell, owner of Great Basin Plumbing, and I’ve completed countless laundry sink installation projects for homeowners across the region — from straightforward utility sink hookups to full drain and vent system builds. Let me walk you through everything you need to know to get this done right.

Planning Your Laundry Sink Installation
Before you start swinging a hammer or cutting into pipes, you need a solid plan. A laundry sink—often called a utility sink—isn’t just a basin; it’s a workhorse. It needs to handle everything from soaking grass-stained jerseys to rinsing out a mucky mop.
The first step in laundry sink installation is deciding which style fits your space and your needs. In our experience serving homeowners from Sandy to Brigham City, we see three main contenders:
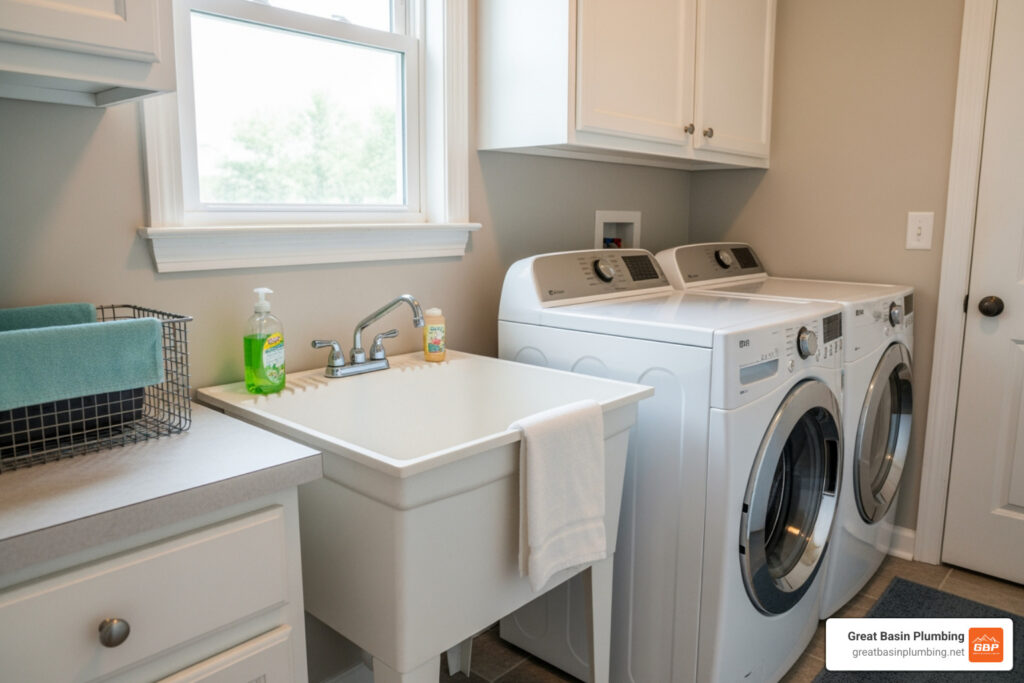
- Freestanding Sinks: These are the classic “utility tubs.” they come with their own legs and stand independently on the floor. They are generally the easiest to install because you don’t need to build a cabinet around them.
- Drop-in Sinks: If you have a countertop in your laundry room, a drop-in sink provides a cleaner, more finished look. You’ll need to cut a hole in the counter, but it offers extra workspace.
- Wall-mount Sinks: These are bolted directly to the wall studs. They save floor space, making them great for tight laundry closets, but they require very secure anchoring to handle the weight of a full basin of water.

Material choice is just as important as style. While a basic plastic or resin sink is budget-friendly (usually $100–$200), stainless steel or stone options ($200–$500+) offer better durability and stain resistance. If you are looking for a specific aesthetic, check out our Utah Plumbing Fixture Services for expert recommendations on the best brands for our local water conditions.
Choosing the Right Location
Location is everything in plumbing. To keep your laundry sink installation costs down, you want to stay as close to your existing plumbing as possible. Usually, this means placing the sink right next to your washing machine.
When scouting the perfect spot, consider these five factors:
- Proximity to Supply Lines: You need easy access to the hot and cold water pipes.
- Drainage Access: Your sink needs to slope down toward the main drain line.
- Electrical Outlets: Ensure you aren’t blocking access to the washer/dryer plugs.
- Flooring: Water-resistant flooring (like tile or vinyl) is a must. If the sink overflows, you don’t want it ruining hardwood or carpet.
- Space: Make sure there is enough room to stand in front of the sink without bumping into the dryer.
Understanding Plumbing Requirements
This is where things get technical. For a successful laundry sink installation, your plumbing needs to meet specific standards to ensure it drains properly and doesn’t smell like a sewer.
According to the experts at How to Install a Laundry Room Sink, you must have a P-trap. This U-shaped pipe holds a small amount of water that acts as a seal, preventing sewer gases from drifting into your home. Additionally, while some older homes might have smaller pipes, a 2-inch drain pipe is the modern standard for shared washing machine and sink setups. This ensures the high-speed discharge from your washer doesn’t back up into your brand-new sink.
Finally, don’t forget the vent! Every drain needs air to flow smoothly. Without a vent, the water will “glug” and drain slowly, or worse, siphoning the water out of your P-trap and letting those stinky gases in.
Tools and Materials Needed
Having the right tools is the difference between a 4-hour project and a 4-day headache. If you’re tackling this yourself, here is your shopping list:
The Heavy Hitters:
- PVC pipe saw for clean cuts on your drain lines.
- Tubing cutter for copper or PEX supply lines.
- Propane torch (if you are soldering copper) or a Drill/driver for mounting.
- Adjustable wrench for tightening faucet connections.
- Safety glasses because PVC shavings in the eye are no fun.
The Materials:
- The sink and faucet kit.
- PVC pipes and a P-trap assembly.
- Plumber’s putty and silicone caulk.
- PEX tubing or copper pipes for the water supply.
- Tee-fittings (to “tap” into your existing lines).
If you’re unsure which fittings are right for your specific home in Salt Lake City or Draper, our Fixture Services can help you identify the right materials for your home’s existing pipe types.
Step-by-Step Laundry Sink Installation Guide
Ready to get your hands dirty? Follow these steps for a standard laundry sink installation.
- Shut Off the Water: This is step zero. Locate your main water shut-off or the local valves for the laundry room. Open the lowest faucet in the house to drain the remaining pressure.
- Mark Your Layout: Use a pencil to mark where the sink will sit. If you’re installing a drop-in, use the template provided with the sink to mark the cutout on the counter.
- Access the Pipes: You may need to remove a section of drywall to see the “guts” of your plumbing. Use a stud finder to avoid cutting into structural wood or electrical wires. For more on handling pipe repairs during this phase, see The Fixer-Upper’s Guide: How to Repair Your Drain Pipes and Sink.
- Drill Through Studs: If you need to run new pipes through the wall, drill holes in the center of the studs and install metal protector plates to prevent future nails or screws from puncturing your new lines.
Tapping Into Water and Drain Lines
Now for the “plumbing” part of the laundry sink installation. You need to connect your new sink to the existing system.
For the water supply, you’ll likely use brass tees. These allow you to “split” the hot and cold lines that currently go to your washing machine. If you have PEX piping, this is as simple as using a crimp tool or push-fit connectors. If you have copper, you’ll be soldering.
For the drain, you’ll typically tap into the existing standpipe (the pipe your washer drains into) using a waste Y-fitting. As noted in How To Install a Utility Sink, you want to ensure the sink’s drain enters the main line at a lower point than the washer’s discharge to prevent overflow.
Finalizing the Laundry Sink Installation
Once the “rough-in” plumbing is done, it’s time for the finishing touches:
- Assemble the Faucet: It’s much easier to install the faucet on the sink before you put the sink in place. Use plumber’s putty or the provided gaskets to create a watertight seal at the base.
- Set the Sink: Move the basin into position. If it’s a freestanding model, adjust the leveling feet so it doesn’t wobble.
- Connect the Tailpiece: Attach the sink’s tailpiece to the drain and tighten the compression nut on the P-trap.
- The Big Reveal: Turn the water back on slowly. Check every single joint for a “weeping” leak. Even a tiny drop can lead to mold over time.
Potential Challenges and Professional Help
While we love a good DIY project, laundry sink installation can get complicated quickly. If you are working in a basement, for example, your drain might be higher than the sink. In this case, you’ll need a drain pump to literally push the waste water uphill.
You also have to navigate local building codes. In places like Box Elder County or Ogden, there are specific rules about how far a vent can be from a trap. Ignoring these can lead to failed home inspections or insurance issues later on. For professional guidance on these complexities, our Utah Plumbing Drain Services are always available.
According to Angi, while the sink itself is affordable, complex modifications to your home’s venting or main drain lines can push costs toward the $1,500 mark.
When to Call a Professional Plumber
We recommend calling us if:
- You are uncomfortable soldering copper pipes (fire and water don’t mix!).
- You need to install a vent stack through your roof.
- You’re dealing with a basement installation that requires a sump or ejector pump.
- You find “mystery pipes” or outdated galvanized steel plumbing behind your walls.
If you hit a snag, don’t sweat it. You can Contact Us anytime, and we’ll get your project back on track.
Frequently Asked Questions about Laundry Sink Installation
Can a washing machine and a laundry sink share the same drain?
Yes, they can! This is a very common setup. The key is using a 2-inch drain pipe to handle the volume and a Y-fitting to merge the two lines properly. Both the sink and the washer must have their own P-traps to prevent sewer gas from entering through the other fixture.
How much does it typically cost to install a laundry sink?
For a DIYer, expect to spend $200–$500 on the sink, faucet, and basic PVC/PEX materials. If you hire a pro, labor rates in Utah typically range from $50–$150 per hour, with the total job often landing between $500 and $1,500 depending on how much wall-opening and pipe-routing is required.
Does a laundry sink require a vent?
Absolutely. Without a vent, the air pressure in your pipes won’t equalize. This leads to slow drainage and can actually suck the water out of your P-trap, leaving your laundry room smelling like a sewer. If running a pipe to the roof is too difficult, local codes may allow an Air Admittance Valve (AAV), which is a small one-way vent attached under the sink.
Conclusion
A successful laundry sink installation transforms your laundry room from a chore-filled closet into a high-functioning utility space. Whether you’re in Sandy, South Jordan, or Park City, having that extra basin makes home maintenance a breeze.
At Great Basin Plumbing, we’re proud to be a family-owned business serving our Utah neighbors with honest pricing and expert craftsmanship. From 24/7 emergency repairs to helping you pick out the perfect utility tub, we’re here to help. Once your sink is in, remember to keep it clean, avoid harsh chemicals that can damage the finish, and check under the sink for leaks once every few months.
Ready to upgrade? Check out our Utah Plumbing Fixture Services to get started today!